
IEECE STEAM Lessons
Science, Technology, Engineering, Art & Math (STEAM)
Physical Science Lessons
Force, motion, energy, heat, electricity, magnets, color and light


Florida Early Learning and Developmental Standard(s):
- VI. Scientific Inquiry-Component C-Physical Science
Gold Objectives:
- Cognitive 11. B., E.
- Science and Technology 26, 28
Building Blocks of STEAM:
- Investigation
- Forces
- Energy
- Problem Solving and Creativity
- Shape
- Classifying
CLASS Domains and Dimensions:
- Instructional Support
- Concept Development
- Language Modeling
- Quality of Feedback
NAEYC Standards:
Curriculum
- 2.F Early Math
- 2.G Science
- 2.H Technology
Teaching
- 3.E Responding to children’s interests and needs
Materials:
“Movers” (small objects of different weights for children to move from the start line to the finish line) such as:
- Pompoms
- Small toys (e.g. cars)
- Tissue Paper
- Feathers
- Tinkering items
- Paper
- (be sure to include heavier objects, too such as a few unit blocks)
“Blowers” (items that can be used to blow the movers):
- Straws with two different diameters. One of each per child and do not let children ‘share’ their straws for germ minimization.
- Optional-Paper fans
- Optional-Recycled plastic bottles to squeeze air out of (Ketchup, Mustard or sturdy plastic bottles)
Additional items:
- Paper envelopes or plastic bag for children to put their straw and materials in to take home.
- Finish and Start lines with colored tape

Preparation:
- Location: Floor or table
- Number of children: 3-5 depending on location and number of blowers and movers
- Place a “start line” and “finish line” of tape on the floor
- Or, use a table and have them move objects from one side of the table to the other
- Place “blowers” (fans, straws, plastic bottles, etc.) on a table for children to select and experiment with
- Place “movers” (pom poms, small objects, paper, etc.) in another area for children to select
Procedure:
- Introduce the children to the activity and the objective which is to experiment with how to move the different objects from the “Start” line to the “Finish” line.
- Encourage children to talk about why they selected the ‘mover’ they chose and what made them pick the ‘blower’.
- Encourage children to observe the effects of the different ‘blowers’ (some will be powerful but will not be easy to ‘aim’ at the targeted ‘mover’. Some will work better for some ‘movers’ than for others.
- Encourage children to notice how the shape and the weight of the ‘mover’ effects how it moves across the floor.
- Encourage children to solve problems as they arise.
Questions:
- What objects do you think will be easier to move by blowing on them?
- Why do you think one blower will work better than another?
- What would happen if you tried to move the objects on the carpet instead of the floor or table?
- Why did it do that?
- Why didn’t it move?
- What can you change to make it work better?
Tips For Success:
- Be prepared to wipe down tables after each group if they are blowing through straws. Quite a bit of saliva ends up on the table and the “movers” that they are blowing on. Do not share or reuse straws for sanitary purposes.
- Test the blowers and movers before offering to children so that you have an idea of which questions to ask and how to best support children’s thinking.
- Test the best location for the start and finish lines.
- Consider having several finish lines so multiple children can experiment at the same time.
- Record the experiments children create.
- Record information like speed and create a chart of the results.
Extension Ideas:
- Offer children materials to build their own “movers” and/or to modify the “blowers”
- Offer powered movers like the ones below for experimentation
- Battery powered small fans – optional
- Bicycle Pump
- Power Pump (e.g. for air mattresses)

Florida Early Learning and Developmental Standard(s):
- V. Mathematical Thinking-Component F-Measurement and Data
- VI. Scientific Inquiry-Component C-Physical Science
- VI. Scientific Inquiry-Component F-Engineering and Technology
Gold Objectives:
- Cognitive 11. E.
- Mathematics 20. A.
- Science and Technology 26, 28
Building Blocks of STEAM:
- Investigation
- Number and Measurement
- Problem Solving and Creativity
- Forces
- Energy
- Tools
- Classifying
CLASS Domains and Dimensions:
- Instructional Support
- Concept Development
- Language Modeling
- Quality of Feedback
NAEYC Standards:
Curriculum
- 2.F Early Math
- 2.G Science
- 2.H Technology
Teaching
- 3.E Responding to children’s interests and needs
Materials:
- Cardboard paper tubes of different sizes
- (20 or more per 5 children, although tubes may be reused if they are not damaged)
- Painter’s tape or masking tape for each pair of children
- Pompoms or balls small enough to fit in paper tubes
- Small cup or container for storing the pom poms for each pair of children
- Basket, Small Bushell or container for each pair of children
Preparation:
- Location: Next to a wall or flat vertical surface
- Schedule: During center time or small group time
- Recommended number of children: 3-5 children
- The number of children will depend on the space allowed and the number of baskets and cardboard tubes. Children could work in pairs.
- Materials will be provided at the location of the activity and some assistance may be needed to get the correct size of tape and to tape the first cardboard tube to the wall. Children will experiment with adding tubes and dropping the pompoms through the tubes into the basket on the floor. So, it will be important that they can remove and reattach the tubes to the wall repeatedly.
Procedure:
- Demonstrate the set up to model the process and get the children excited about the
activity.
- Have a child help you tape a cardboard tube to the wall at an angle.
- Choose another child to help tape another tube with the opening below the opening of the tube on the wall.
- Have a third child place the basket or container below the lower tube to catch the pompoms.
- Have a volunteer take a pompom out of the cup or small container and drop a pom pom to test out pompom chute and if it lands in the large basket, bowl or container.
- Use words like experiment and test for trying out different configurations.
- Scaffolding suggestions
- Partner children up that need help with taping the tubes on the wall with others that have been successful
- Glue magnets to the tubes and use a metal or magnetic surface to stick the tubes to (eliminates the use of tape)
Questions:
- Do the pompoms slide or roll down the chute?
- What other objects would slide or roll down your chute?
- Why didn’t that work?
- How can you fix it?
- What would happen if you moved the tube?
- Why do the pompoms fall through the tubes?
Tips For Success:
- Have the children put the pompoms back in the cups or small containers and remove their tubes from the wall before they move to another center.
- Save the tubes, unused tape and pompoms in a tub for storage and future use.
Extension Ideas:
- Have the children sort pom poms by color.
- Tape a row of tubes vertically on a wall or flat surface about one foot apart and paint them different colors.
- Put a bowl or container below each tube.
- Place a large tub of pompoms with a variety of colors for them to sort.
- Have the children use plastic tweezers to pick up and drop the pompoms to develop fine motor skills.
- Create a chute for dropping items into the trash can or recycle bin in your classroom. (you may need a wider tube or a tall skinny box)
- Use a stopwatch to see how long it takes for the pom pom to move through the chute
- Use a stopwatch to see how long it takes to fill the basket with the pompoms or to organize them all by color
Life Science Lessons
Ecology, animals, plants, human body and senses


Florida Early Learning and Developmental Standard(s):
- IV. Language and Literacy-Component A-Listening and Understanding
- IV. Language and Literacy-Component C.-Vocabulary
- VI. Scientific Inquiry-Component B-Life Science
Gold Objectives:
- Language 10. A.
- Cognitive 11. E.; 12. A., B.; 13.
- Science and Technology 24, 25
Building Blocks of STEAM:
- Investigation
- Problem Solving and Creativity
- Classifying
- Animals
- Plants
CLASS Domains and Dimensions:
- Instructional Support
- Concept Development
- Language Modeling
- Quality of Feedback
NAEYC Standards:
Curriculum
- 2.G Science
Teaching
- 3.E Responding to children’s interests and needs
Materials:
- Interesting photograph of a plant or animal (not a drawing or clip art)
- Sticky notes
- Chart paper or note pad to record student responses
Preparation:
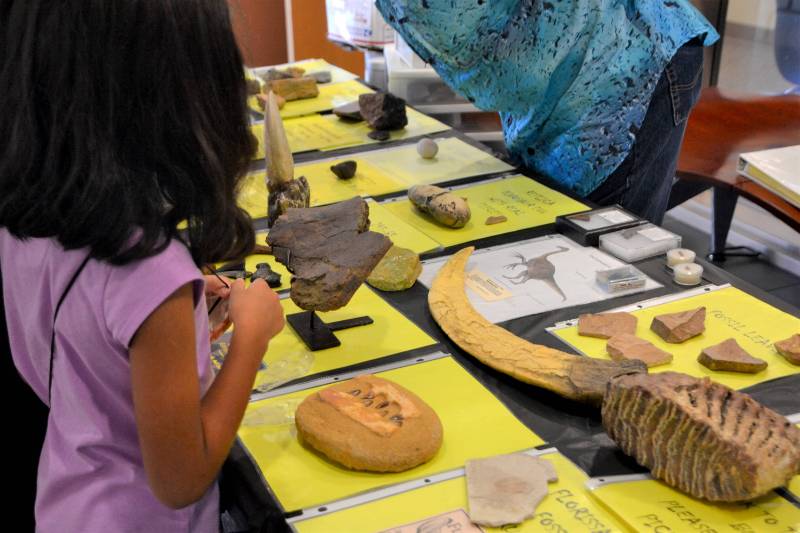
- Find an image/photograph of an interesting plant or animal.
- Cover the image with sticky notes in rows and columns.
- Or, show the whole image at once
- Activity can be small group or whole group but is teacher directed and initiated.

Procedure:
- Make sure that all children can see the image clearly.
- Peel off one sticky note to reveal a small part of the picture. Or, show the entire image at once.
- Ask children to look closely at the exposed portion of the picture carefully.
- Ask the children what they see and what they think is in the picture.
- Make sure you have the children get the opportunity to share what they see by using a Think, Pair, Share protocol with the children. (The think about what they see and take turns sharing it with a partner sitting next to them.)
Questions:
- What do you notice in the picture that you can see?
- What do you think will be behind the next piece we remove?
- What piece should we remove next?
- What do you notice about the (color, shapes, lines, textures)?
- Why do you think that?
- What does that make you think of?
- Why did you say that?
- What else do you notice?
- Where do you think this (animal or plant) lives?
- Why do you think it is (color, shape, size)?
- What might be happening in the picture?
- Is it a picture of something you have seen before?
- What would you like to learn more about (plant or animal)?
- What are you curious to find out more about?
Tips For Success:
- Encourage their interest, curiosity, and thinking.
- Choose a picture that is relevant to the children’s lives. When we look closely at something, even something we’ve seen thousands of times before, we can learn something new.
- Keep asking questions and take your time. Try and notice more and become more curious yourself.
- Get down on children’s level.
- Look at something upside down or from a different perspective.
Extension Ideas:
- Try the activity without the sticky notes and just look closely at images.
- Find images that are unfamiliar or zoomed in and difficult to figure out.
- Try adding numbers or letters to the sticky notes to add math or literacy elements.
Activity idea came from Making Thinking Visible by Ron Ritchhart, Mark Church and Karin Morrison
Image by Marcel Langthim from Pixabay
Earth and Space Science Lessons
Geology (rocks, minerals), water, atmosphere, weather/climate, natural disasters, solar system and universe

Florida Early Learning and Developmental Standard(s):
- V. Mathematical Thinking-Component F-Measurement and Data
- VI. Scientific Inquiry-Component D-Earth and Space Science
Gold Objectives:
- Cognitive 11. E.
- Science and Technology 26, 28
Building Blocks of STEAM:
- Investigation
- Number and measurement
- Shape
- Classifying
CLASS Domains and Dimensions:
- Instructional Support
- Concept Development
- Language Modeling
- Quality of Feedback
NAEYC Standards:
Curriculum
- 2.F Early Math
- 2.G Science
- 2.H Technology
Teaching
- 3.E Responding to children’s interests and needs
Materials:
- Rocks (different shapes, sizes, and textures)
- Ziplock bags, paper bag, cups or containers
- Scale, cash register
- Paint, paint brushes
- Animal figures
- Sandbox
Preparation:
Include these items in your learning centers:
- Whole group/Language center- Real rocks (different sizes and types), posters, books about rocks, and earth science.
- Water bins/table- soapy water, dry cloths, scrub brushes/toothbrushes (new), rocks, stones, gems
- Art area- rocks, paint, paintbrushes, glue, googly eyes, and endless art materials
- Sandbox- rocks, gems, animals, magnifying glasses
- Math/fine motor- Rocks, scales, graphs, cash register
Procedure:
- During circle or large group time introduce the children to the idea of discovering
rocks. You may read books about rocks and bring in real rocks so that they can see
and touch (this will be a good time to ask good steamy questions that focus on planning).
- How could we find out more about rocks?
- What could we do to test our ideas?
- What could you do instead?
- What could we use to find out?
- Where could we go to find out more about rocks?
- Where could we look to get more information?
- Take the children out on a nature walk. Remind them that they are searching for rocks of different shape, color, size and texture. During the nature walk you can sing the song “We’re going on a rock hunt” sung to “We’re going on a bear hunt” tune. Give children a cup, zip-lock/paper bag to collect their rocks.
- During this time try these questions to deepen learning.
- What makes you say that?
- What does that remind you of?
- What makes these things go together?
- How is this like…?
- How are they different?
- When have you seen something like…?
- What do you know about?
- In the Science area take a closer look at the rocks that were collected during the nature walk by laying them all out on the table and using magnifying glasses to investigate (this will be a good time to ask those steamy questions).
- At your water table children can wash and polish rocks using soapy water and dry cloths.
- In the art area, children can use various colors of paint, and paint brushes.
- In your math/fine motor area children can weigh, sort, compare sizes, and make patterns using the rocks collected.
- In the sandbox add rocks, animals, magnifying glasses, and gems for a day. Talk to the children about paleontologist and their role in society.
- Children can explore the books that support rocks and earth science in the language center.
- Continue to ask those open-ended questions that will allow the children to notice and discover all the great things about rocks.
Extension Ideas:
- The Discovering rocks activities can be extended during outside time. You can teach the children the game hopscotch. Each child will have their own rock to toss into the square during the game.
Chemistry Lessons
Mixtures, solutions, and state changes (solid, liquid and gas)

Florida Early Learning and Developmental Standard(s):
- V. Mathematical Thinking-Component F-Measurement and Data
- VI. Scientific Inquiry-Component C-Physical Science
Gold Objectives:
- Cognitive 11. E.
- Mathematics 20. A.
- Science and Technology 26, 28
Building Blocks of STEAM:
- Number and Measurement
- Change
- Chemistry
- Light and Shadow
- Investigation
CLASS Domains and Dimensions:
- Instructional Support
- Concept Development
- Language Modeling
- Quality of Feedback
NAEYC Standards:
Curriculum
- 2.F Early Math
- 2.G Science
Teaching
- 3.E Responding to children’s interests and needs
Materials:
- Two cups of corn starch per child
- One cup of water per child
- 2 large bowls to hold the corn starch and water for the group
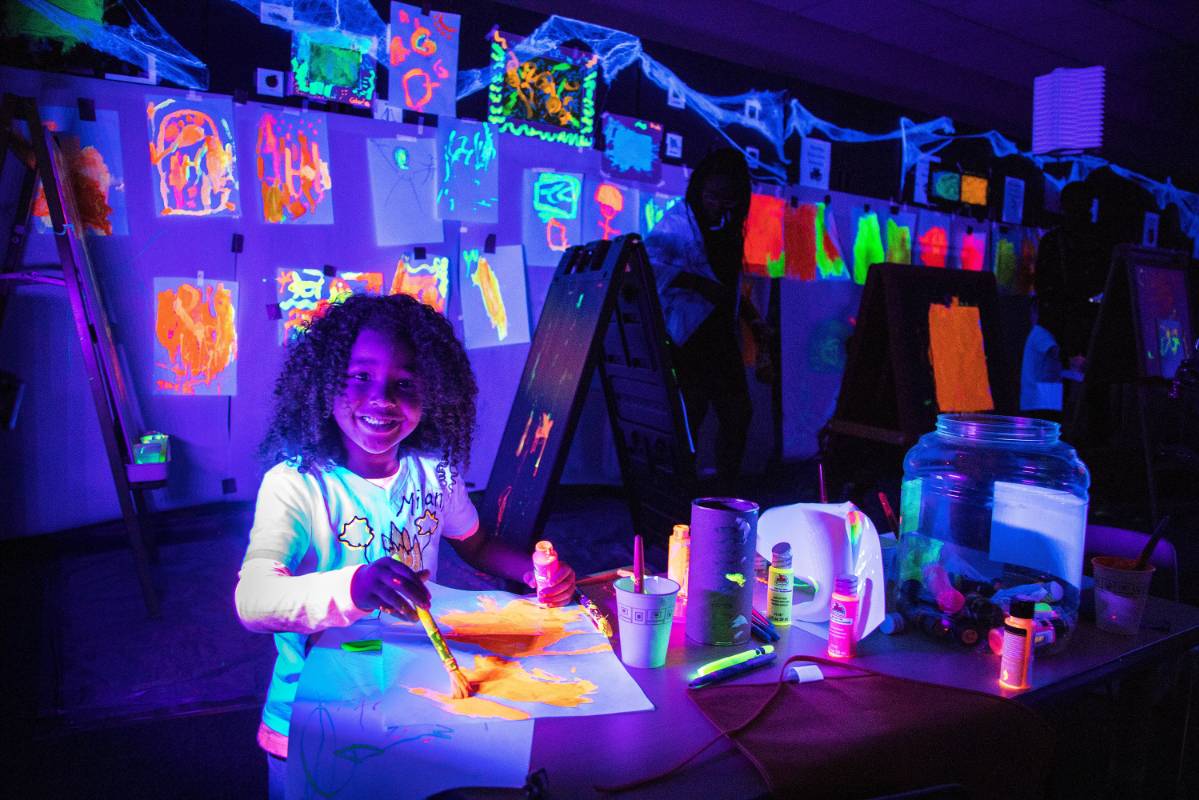
- Neon paint
- Medium sized clear bowl (one per child)
- Blacklight /flashlight
- Measuring cups
- Tub or small bucket for cleaning hands
- Book: Bartholomew and the Oobleck by: Dr. Seuss
 Preparation:
- During your circle time read the book Bartholomew and the Oobleck or a similar book.
- This experiment works best in small groups with no more than six children sitting at a table
- Spread a disposable tablecloth over the table to make it easy for clean-up
- During centers or before small group set up each space with materials for each child allowing them to have their own bowl and measuring cup.
- In the middle of the table set up two large bowls. Fill one with corn starch and the other with water. Have several bottles of neon paint. Make all materials accessible for the children.
Procedure:
- First, the children will measure one cup of water and add it to their bowl
- Next, the children will measure two cups of corn starch and add it to the same bowl
- After that, the Children will add neon paint to their bowl and mix with their bare hands or a mixing utensil until well mixed and mixture turns hard.
- At this point the children will notice a change in the substance when they squeeze it tight in their hands and another change when they release it. Oobleck mimics the qualities of a solid and a liquid. The fun doesn’t stop here.
- Give each child a black light flashlight (or anchor one to reflect over the experiment) and have them turn them on.
- Now, turn off the lights in the classroom and discover what happens next. The children will notice the glow effect on the Oobleck.
- Refer to the questions below to support children as they begin to discover, investigate, and notice what is happening.
Questions:
- What’s happening now?
- What happened when you added the corn starch to the water?
- What happens when you squeeze the Oobleck tight?
- What happens when you release the Oobleck?
- Why do you think that happened?
- What changed?
- How could we do it different?
- What happened when we turned the lights out?
- What surprised you?
- How long did it take the mixture to stop moving while you were stirring it?
- Why do you think it is solid when pressure is applied?
- Why do you think it becomes like liquid when pressure is released?
- How many glowing colors can you count?
Tips For Success:
- Make sure when you’re speaking to the children you are on their eye level. All materials should be present and accessible during the time of the activity. Don’t forget to refill materials as needed.
- Once the activity is complete clean and sanitize the work area.
- The Oobleck will rub off the skin and fall into the container.
- You can use a small tub or bucket of water to rinse off any Oobleck that will not come off.
- Do NOT pour the Oobleck down the sink or down your garbage disposal. The thick substance could cause blockage. Place the mixture in the trash can.
Extension Ideas:
- What would happen if you added baby powder or baking soda to this experiment? What if you tried it with food coloring instead of neon paint? What will happen to its texture?
Math Lessons

Florida Early Learning and Developmental Standard(s):
V. Mathematical Thinking-Component F-Measurement and Data
VI. Scientific Inquiry-Component C-Physical Science
Gold Objectives:
- Cognitive 11. E.
- Mathematics 20. A.
- Science and Technology 26, 28
Building Blocks of STEAM:
- Investigation
- Number
- Problem Solving and Creativity
- Forces
- Energy
CLASS Domains and Dimensions:
- Instructional Support
- Concept Development
- Language Modeling
- Quality of Feedback
NAEYC Standards:
Curriculum
- 2.F Early Math
- 2.G Science
Teaching
- 3.E Responding to children’s interests and needs
Materials:
- Pompoms (tissues crumpled into balls or soft balls of any kind will work)
- 5-10 (or more) baskets (buckets, cups, bowls, bins…almost anything will work)
- Counting bears (optional, but helpful)
- Labels for the baskets with “points” written on them (it’s valuable to put the corresponding number of dots on the sign as well. Using the layout for dice is useful)
- Paper for a “score board”
Preparation:
- Label each basket with a number and the number of dots that correspond with the number. You can (and should) repeat numbers. That is, if you used 10 baskets, you might have this arrangement of numbers: 1-1-1-2-2-2-3-3-3-3.
- Add the same number of counting bears to the baskets as the number on the baskets.
- Place the baskets in whatever arrangement you like.
- Note: You may need to rearrange and adjust the placement of the baskets to make getting the pompoms in easier or harder.
Procedure:
- Encourage children to take turns throwing pompoms into the baskets.
- When a child has landed 2 pompoms into baskets, ask the child to read to you the numbers on the baskets- OR if they need help, ask them to count the dots on each of the baskets or the number of bears inside the basket. Note: You may have to model counting for the children.
- When children are ready and/or interested, record the two numbers on a score board
- Have the child (independently or with a friend and/or with teacher support) count the TOTAL number of bears from their baskets (3 bears from one basket and 2 bears from another basket will have a total of 5 bears). Note: with some time and familiarity, children may be able to do this without the counting bears, using the dots, but it is always more valuable for them to have the option to use something tangible to help them count.
- When children are ready and/or interested, record the total of the numbers on a score board.
- Use language like:
- “addition”
- “You figured out when you add three and two, you get five”.
- “You got a total of 5 points with your two baskets!”
Questions:
- How do you think we could make a bigger total point number?
- Why do you think the pompoms fall towards the ground when you throw them?
- Which way of throwing pompoms works the best for you?
- How do you know how many points you made?
- Why are the little bears in the baskets?
- What are some different ways you can find out how many points a basket is worth?
- How do you know what the total number of points are for both basket?
Tips For Success:
- Have a start line for where children should stand when they throw.
- Have each child continue to throw their pompoms until they make *2* baskets. (Note: with some experience, you can consider moving up to 3 or even more, but certainly start with only two). Some children will only require two throws, other children may need many more chances.
- Start with very small numbers (1-3). As children become more and more familiar with combining these numbers, you can add larger numbers.
- This works particularly well on a large table, but also works quite well on the floor. You could even consider figuring out a way to mount the baskets on the wall. (We’ve done this with Clear Contact paper stuck with the sticky side out stuck to construction paper and then taped to the wall. That’s quite fun, but the pompoms don’t always stick fantastically)
- The value of this lesson is simply in having lots of experience with the CONCEPTS of addition, quantity, number, and numerals. The more fun, engaging experiences children have with these concepts, the better they will understand and “own” them when they are ready to apply them in different circumstances. Children will be gaining experience with combining numbers and seeing the result.
Extension Ideas:
- Encourage children to throw a large number (more than 5) pompoms at the same time up in the air. See how many pompoms land in any basket. You can choose to have them follow the above steps to combine points, but this is very complex and not at all necessary. Use language like 7 of the 10 pompoms you threw landed IN a basket! 3 of the 10 pompoms you threw landed on the floor.
Art Lessons

Florida Early Learning and Developmental Standard(s):
- VI. Scientific Inquiry-Component B-Life Science-Benchmark d.
- VIII. Creative Expression through the Arts-Component E-Appreciation of the Arts-2.
Gold Objectives:
- Cognitive 11. E.
- Science and Technology 25, 27
Building Blocks of STEAM:
- Investigation
- Senses
- Plants
- Classifying
CLASS Domains and Dimensions:
- Instructional Support
- Concept Development
- Language Modeling
- Quality of Feedback
NAEYC Standards:
Curriculum
- 2.G Science
- 2.J Creative expression through the arts
Teaching
- 3.E Responding to children’s interests and needs
Materials:
- Planting a Rainbow book by Lois Ehlert or a similar book
- Large bouquet of flowers in various colors and types (real and artificial)
- Canvas, paper, paints, crayons, markers, paint brushes, tissue paper, glue
Preparation:
- This activity works best at a table in the art center close to a sink
- Teacher will provide a bouquet of flowers, have children bring in flowers from home, or pick flowers from outside
- Display materials on the table (make accessible)
Procedure:
- In a large group setting read the book Planting a Rainbow to the children. Encourage the children to name flowers they recognize in the book. If a flower in the book is represented in the class bouquet, share that with the class. Discuss the different colors represented in each type of flower. Talk about where flowers come from and how they grow.
- Bring the flowers that were collected to the to the large group setting and pass them around for the children to investigate and describe the shape, smell, color, and texture of the different flowers.
- Tell the children about the variety of materials that’s been added to the art center.
- Tell them that they will be making their own artwork using the flowers as inspiration.
- Tell them that they will not be using the flowers as paintbrushes or taking the flowers apart.
- Ask them to think of ways they can use the materials to create their own piece of art.
- Invite the children to sort the flowers by color, size, or type.
- Ask them:
- “What can we do with these flowers using the materials that we have”
- “How can we create patterns using all of these colorful flowers”?
- Allow children to be open and creative. If the activity spirals off into a different direction, it’s okay. That means the children have taken the lead and that’s exactly what we want. Some children will choose to create patterns while others may choose to look closely at the flowers and paint their own version like an artist.
- Encourage the children to talk about their picture (record what they say).
- Refer to questions listed below to start conversations that will get the children noticing, wondering and deepening their thoughts about flowers.
Questions:
- What can we do with these flowers and the materials that are on the table?
- How can we create patterns using these colorful flowers?
- How did you decide to...?
- What if we...?
- How many _____do you think we need?
- I noticed that you...why?
- What details did you notice?
- Which has more?
- Tell me about your picture?
Extension Ideas:
- You can reuse the flowers in the dramatic play area and open a flower shop.

Florida Early Learning and Developmental Standard(s):
- VI. Scientific Inquiry-Component B-Life Science-Benchmark d.
- VIII. Creative Expression through the Arts-Component E-Appreciation of the Arts-2.
Gold Objectives:
- Arts 33.
- Science and Technology 25, 27
Building Blocks of STEAM:
- Investigation
- Problem Solving and Creativity
- Shape
- Senses
- Plants
- Classifying
- Chemistry
- Change
CLASS Domains and Dimensions:
- Instructional Support
- Concept Development
- Language Modeling
- Quality of Feedback
NAEYC Standards:
Curriculum
- 2.G Science
- 2.J Creative expression through the arts
Teaching
- 3.E Responding to children’s interests and needs
Materials:
- Colored tissue paper (make sure it’s not labeled ‘non bleed’)
- Glue (thinned slightly with water)
- Paper (large rolled paper can be used for more cooperative experiences. Paper plates work well, too.)
- Paint brushes
Preparation:
- Place glue (add a small amount of water to thin the glue slightly) in shallow bowls for children to access. Limit the amount of glue that might spill and be prepared to add more as the children use it.
- Place tissue paper (sorted by color if you prefer) in small, shallow bowls or boxes for children to access independently. Paper cut or torn to small (but not tiny, perhaps 2 inches) pieces works best.
- Lay out paint brushes for children to use (and be prepared to encourage them to wash out their brushes when they get saturated with glue and/or when the tissue paper stains the brushes)
Procedure:
- Encourage children to explore the effects of the wet glue on the tissue paper.
- Encourage children to place a few pieces of tissue paper on the paper (or paper plate) and lightly brush glue over the tissue.
- Encourage children to layer different colors of tissue paper on top of each other and to notice the effects of mixing different colors. As you do, use language like, “Chemists mix different things together to create new things, just like you’re doing with these colors!” and “When you add the glue to the tissue paper, both the tissue paper and the glue change each other.”
- Ask children question:
- How is layering tissue paper like making lasagna? (possible responses)
- Both have layers
- How is layering tissue paper different than making lasagna? (possible responses)
- You can’t eat tissue paper lasagna.
- You cook lasagna.
- The paper changes colors more than the lasagna…but they do both change colors, etc.
- How is layering tissue paper like making lasagna? (possible responses)
- The children will need to experiment with how much glue to use, how many layers of tissue paper will work best, how many layers to make, etc. Encourage them to “be scientists” and investigate and experiment with different amounts and approaches. Encourage them to talk about their discoveries.
Questions:
- Why did that happen?
- What do you think will happen if …?
- What color do you think that will make?
- What is happening to the color of the glue?
- What will happen if you put one color paper on another color paper?
- What is happening to the paper when you add the glue?
- Why did we add water to the glue?
Tips For Success:
- You can tear or cut the tissue paper before offering it to children, but children love to cut and to tear paper. This helps them develop stronger fine motor control in addition to being fun.
- Ideally, set up a ‘station’ where children can tear and sort the paper into small containers before using it for their STEAMy art.
- Read any of Eric Carle’s books with the children and encourage them to notice how he used torn tissue paper to create his illustrations.
- It’s wise to cover the work area with a plastic tablecloth or other protective surface.
- Test the thickness of the glue before offering to children.
- Note that tissue paper often has several layers. Different brands will work differently. Test before offering to children so you can support their investigation.
- Note: the tissue paper will ‘bleed’ when the glue wets it. This will stain the glue in the containers and the paintbrushes. It is important (for both your sanity and for the children’s thinking and learning) that you allow this to happen and not insist that each glue container remain ‘pure’ to a single color.
Extension Ideas:
- Encourage children to make their own watercolors by adding different colors of tissue paper to water and leaving for several minutes to hours. Encourage children to experiment with different amounts of tissue paper, different colors, etc. Record each child’s ‘recipe’ for their color creations. Later, offer children the watercolors that they made, paintbrushes, and paper. Encourage children to talk about how both their color creations and their paintings.
- Tissue paper lasagna can also be applied to plastic (or glass). Collect water bottles over time and offer children the opportunity to cover them in layers of tissue paper and glue. These can be used as a vase or a small, electronic tea light can be added (if you cut off the neck of the bottle).
- On another day (or for younger children), offer clear contact paper instead of glue.
- Peel the back off the clear contact paper,
- Tape the edges of the contact paper to the table using masking tape, with the sticky side of the contact paper facing up.
- Encourage children to stick tissue paper to the sticky contact paper.
- When they’ve finished their creations, place either a piece of paper (for an opaque back) or another piece of clear contact paper to the collage. If you use the two layers of clear contact paper, you can hang these in a window and/or explore the children’s creations with a flashlight.
Coding, Technology and Engineering

Florida Early Learning and Developmental Standard(s):
- V. Mathematical Thinking-Component F-Measurement and Data
- VII. Social Studies-Component D-Spaces, Places and Environments
Gold Objectives:
- Cognitive 11. B, E; 14. A
- Language 8. A,B; 9. B
- Math 21. A
Building Blocks of STEAM:
- Investigation
- Problem Solving and Creativity
- Senses
CLASS Domains and Dimensions:
- Instructional Support
- Concept Development
- Language Modeling
- Quality of Feedback
NAEYC Standards:
Curriculum
- 2.F Early Math
Teaching
- 3.E Responding to children’s interests and needs
Materials:
- Command cards located at the end of this document for printing (print, cut out and laminate for each pair of children)
- Chair for each pair of children
- Sticky notes or paper
- Preparation:
- Set up a chair for each pair in the room with the robot’s name on it with a sticky note or piece of paper
- Set up command cards for each pair of children in stacks
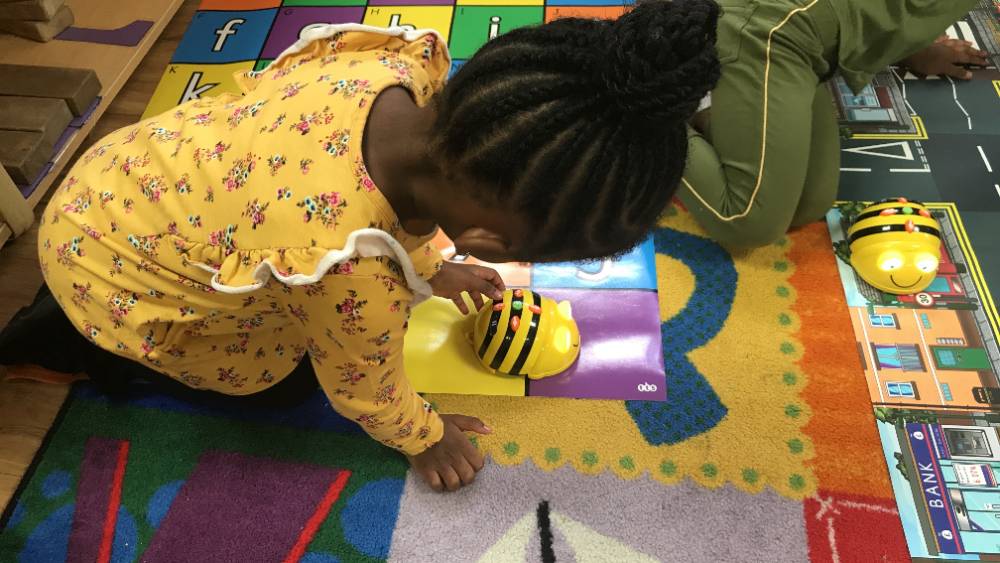
Procedure:
- Ask the students if they know how computers and robots work.
- Explain that robots are computers and only do what they are told to do.
- Demonstrate giving and receiving commands by having the children stand, sit, jump, spin and walk by giving commands one at a time.
- Partner the children up and have one be the programmer and the other be the robot. (They will each get a chance to be a programmer and robot.)
- Give the following instructions:
- You will be programming your robot friend to move from the wall of the room to the chair with their name on it.
- You will need to locate the chair with your robot’s name on it.
- You must hold up a card and show it to the robot and hold it up until they complete the command.
- You can make your robot spin in a complete circle with the Gear image or jump for fun using the spring image.
- You can use the walking command to make your robot friend take one step forward
- You can use the turning arrows to make your robot turn left or right.
- You can use the image with the seated person on the chair to get your robot to sit down in the chair.
- Repeat the activity so the children can switch roles as programmer and robot.
Questions:
- How did you get your robot to follow your commands?
- What was the hardest part about programming your friend as a robot?
- What would you do different next time?
- How are people different than robots?
Tips For Success:
- Play “Simon Says”, “Red Light, Green Light” and other games with commands to practice first.
- Have a child program the teacher as a demonstration. Only do what the programmer tells you to do.
Extension Ideas:
- Ask the children what else a human robot can do with commands.
- Ask the children what other command cards you should make.
- Create new command cards. Such as: “Pick Up” or “Put Down” for collecting objects in the room.
- Create a course that the robots must complete with commands.
- Use “Pick Up” and “Put Down” commands to direct the robots to go and retrieve something and bring it back to the start location.
Printable Command cards


Florida Early Learning and Developmental Standard(s):
- I. Physical Development-Component C-Fine Motor Development
- V. Mathematical Thinking-Component F-Measurement and Data
- Vi. Scientific Inquiry-Component F-Engineering and Technology
Gold Objectives:
- Cognitive 11. E
- Science and Technology 26, 28
Building Blocks of STEAM:
- Investigation
- Number and Measurement
- Problem Solving and Creativity
- Shape
- Tools
CLASS Domains and Dimensions:
- Instructional Support
- Concept Development
- Language Modeling
- Quality of Feedback
NAEYC Standards:
Curriculum
- 2.F Early Math
- 2.G Science
- 2.H Technology
Teaching
- 3.E Responding to children’s interests and needs
Materials:
- 6-inch bamboo skewers
- Play Dough
- Play Dough tools
- Paper/markers
- Paint/ Paintbrushes
- Book: If I Built a House by Chris Van Dusen or a similar book

Preparation:
- Prior to starting this learning experience it’s a good idea to strike up a conversation with the children about building structures. During circle or whole group time read the book If I Built a House by Chris Van Dusen or a similar book of this sort. Ask the children: “What are structures"? “What are the first steps in building a structure”? Remind them that architects design buildings by drawing them out on paper, and engineers take the blueprints/drawings and build the structure. This is a great way to get them thinking about building structures and having the freedom to be creative and innovative.
- This activity is best if the children are sitting at a round or rectangular table that holds at least six chairs.
- If the tip of the skewers seems a little sharp, file them down so they’re not a safety hazard
- Make sure the table has been sanitized. Once the table is cleaned place the materials on the table making them accessible for the children.
Procedure:
- During center time the teacher will sit with the children at the table and have them reflect on the story that was read in circle time “If I Built a House” or a similar book.
- Place the paper, pencils and markers in the middle of the table. Encourage children to draw a blueprint of their structure before building it.
- Once they are finished with their blueprints and are ready to move on give them the Play Dough, tools, and skewers. Encourage the children to cut and roll the Play Dough into little balls with the palm of their hands. After they’ve rolled enough Play Dough balls to create their planned structure, they can begin to build their Play Dough structure by attaching the balls to the skewers until they have created their structure.
- If a child seems to not know where to begin make scaffolding suggestions like:
- What do you already know about structures?
- Is a house a structure?
- What should you do first?
- As the children are working on their structure the teacher will refer to the questions listed below to start conversations that will get the children investigating, wondering and deepening their thoughts about building structures.
- When the structures are built encourage the children to paint and decorate their structures using the painting materials.
- When the activity is complete ask the children to tell you about their structure. Have them present their structures to the class.
Questions:
- What can we do with the Play Dough to make the skewers stand in a certain position?
- Can you guess how many skewers and Play Dough pieces it will take to build your structure?
- What are some things that might change the shape of your structure?
- What design do you have in mind?
- What’s happening?
- What does this remind you of?
Tips For Success:
- Make sure when you’re speaking to the children you are on their eye level. All materials should be present and accessible during the time of the activity. Don’t forget to refill materials as they get low.
- Once the Play Dough Structures activity is complete clean and sanitize the work area.
Extension Ideas:
- Teachers can add additional items like cheese cubes, grapes, and raisins to this project making this activity a snack structure during snack time. Toothpicks will be a great alternative for the skewers. After building the structure the children will get to enjoy a yummy snack.

Florida Early Learning and Developmental Standard(s):
- V. Mathematical Thinking-Component F-Measurement and Data
- VI. Scientific Inquiry-Component C-Physical Science
- VI. Scientific Inquiry-Component F-Engineering and Technology
Gold Objectives:
- Cognitive 11. E.
- Mathematics 20. A., 22. C.
- Science and Technology 26, 28
Building Blocks of STEAM:
- Investigation
- Number and Measurement
- Problem Solving and Creativity
- Forces
- Energy
- Tools
- Shape
- Classifying
CLASS Domains and Dimensions:
- Instructional Support
- Concept Development
- Language Modeling
- Quality of Feedback
NAEYC Standards:
Curriculum
- 2.F Early Math
- 2.G Science
- 2.H Technology
Teaching
- 3.E Responding to children’s interests and needs
Materials:
- Aluminum foil
- Play-Doh or modeling clay
- Marbles, pennies, toys, blocks or other items to test the boats buoyancy
- Tape
- Glue
- Pipe cleaners
- Craft sticks or popsicle sticks
- Clothes pin (wooden or plastic)
- Small Towels or paper towels for cleaning up and can be used for placing boats on to absorb water after testing in the water
- Other creative materials for experimenting with building boats
- Pictures of boats and books with boats: Who Sank the Boat? by Pamela Allen and Brilliant Boats by Tony Mitton and Ant Parker or similar books
Preparation:
- Set up many locations for testing boats throughout the room on tables or on the floor using tubs with water, bowls with water, and sinks with water.
- Children can work individually, in pairs or groups
- Materials will be given out each day or session of the lesson
Procedure:
Day 1
- Start with the whole group during circle time.
- Read a book about boats:
- Who Sank the Boat by Pamela Allen
- Brilliant Boats by Tony Mitton and Ant Parker
- Or another boat book of your choosing
- Do a short demonstration with discussion about why things sink or float.
- Show the children some Play-Doh or modeling clay
- Ask the children:
- Do you think the Play-Doh will float in water?
- What can I do to try and get the Play-Doh to float? (flatten it out or mold/shape it into a boat)
- What did we notice about the shape of the boats in our books and pictures?
Day 2
- During circle time ask the children:
- What was the heaviest object that you could float in your boat?
- What else could you change or add to make your boat float better?
- Tell the children that today they can use aluminum foil to make their boat.
- Ask the children:
- How can we make the flat foil into the shape of a boat?
- Model shaping the foil or have a child model it for the class
- Give each child a piece of foil to shape into a boat and test.
Day 3 and on
- Provide the children with more boat making tools like craft sticks and pipe cleaners.
- Ask the children what else might make their boat float better.
Questions:
- What can you do to make it float better?
- How did you decide on that type of boat?
- What was the hardest part about building a boat?
- What will happen if we …?
- Why do you think the boat sank?
- Why do you think this boat will float better?
Tips For Success:
- Have pictures of boats and toy boats to help with design ideas
- Have a sticky notes or small pieces of paper to store the children’s boats until the next day.
- Have towels available for clean-up and for setting the wet boats on to dry.
Extension Ideas:
- Have the children find leaves outside that might float like a boat.
- Have the children experiment to see which leaves float the best and hold the most pennies or objects.
- Have the children build a boat out of LEGOs.
- Have the children at sails to their boats and try to blow them across a container of water.
- Have the children decorate their boats.

Florida Early Learning and Developmental Standard(s):
- V. Mathematical Thinking-Component F-Measurement and Data
- VI. Scientific Inquiry-Component C-Physical Science
- VI. Scientific Inquiry-Component F-Engineering and Technology
Gold Objectives:
- Cognitive 11. E.
- Mathematics 20. A., 22. C.
- Science and Technology 26, 28
Building Blocks of STEAM:
- Investigation
- Number and Measurement
- Problem Solving and Creativity
- Forces
- Energy
- Tools
- Shape
- Classifying
CLASS Domains and Dimensions:
- Instructional Support
- Concept Development
- Language Modeling
- Quality of Feedback
NAEYC Standards:
Curriculum
- 2.F Early Math
- 2.G Science
- 2.H Technology
Teaching
- 3.E Responding to children’s interests and needs
Materials:
- Tubs or buckets that are less than 12 inches wide as supports for each end of the bridge.
- Strips of paper about 2-3 inches wide and about 12 inches long
- Strips of cardboard about 2-3 inches wide and about 12 inches long
- Tape
- Glue
- Pipe cleaners
- Craft sticks or popsicle sticks
- Clothes pins (wooden or plastic)
- Toys, blocks and other items to test the strength of the bridges
- Other creative materials for experimenting with building bridges
- Pictures of bridges
- Stories and books on bridges and strong structures:
- Three Little Javelinas by Susan Lowell, Three Little Pigs, or Three Billy Goats Gruff.
- Or another book of your choice on structures or bridges
Preparation:
- Set up many locations for testing bridges throughout the room on tables or on the floor using tubs, boxes, tables or chairs to create a gap for the bridge to cross.
- Children can work individually, in pairs or groups
- Activity can be whole group, small group or as a center station or stations
- Materials will be given out each day or session of the lesson
Procedure:
Day 1
- Start with the whole group during circle time. (Have strips of paper, cardboard, 2 blocks or tubs, a lightweight object (paper clip or plastic coin) that a paper bridge will support and an object that is a little bit heavier that the cardboard bridge will support but will collapse the paper bridge (plastic LEGO or toy)
- Read a book about bridges and strong structures:
- The Three Little Pigs
- Three Billy Goats Gruff
- Three Little Javelinas by Susan Lowell
- Introduce the bridge investigation to the children using only paper strips and cardboard strips.
- Demonstrate putting a strip of paper across a gap between 2 support structures (2 blocks, 2 tubs or 2 tables) and place a lightweight item in the middle of the bridge (like a paper clip or small plastic coin or checker)
- Ask the children:
- Do you think it will hold up a heavier object?
- Demonstrate with a heavier object on the paper bridge that will collapse the bridge but will work on the cardboard bridge (A Lego or plastic toy should work, test it out before the demonstration)
- Ask the children:
- Why did the bridge collapse?
- Do you think a cardboard bridge could hold up the heavier object?
- Test the cardboard bridge with the heavier object.
- Ask the children:
- Why did the cardboard bridge hold up the heavier object?
- What might we be able to do to the paper or cardboard bridges to make them stronger?
- What might you do with the materials to make a stronger bridge that will hold even heavier objects?
- Tell the children that during their bridge investigation this week, they will get new materials to build bridges with each day. Today we are using paper, cardboard and tape.
- Give the children tape, paper strips, cardboard strips and objects to test on the bridges.
- Give the children a 15-minute block of time to experiment and test out different bridges with different objects. (extend the time if they are still engaged in the activity after 15 minutes)
- Have the children write their name on their paper bridges to save for the next day.
- Move around the room asking some of the open-ended questions in the Questions section below.
- (some possible creations will involve twisting the paper, using multiple strips of paper or cardboard, and taping the ends of the bridge to the support structure)
Day 2
- During circle time ask the children:
- What worked the best for building bridges with paper, cardboard and tape?
- What could you do if you had pipe cleaners and craft sticks to build with?
- Give the children a 15-minute block of time to experiment and test out different bridges with the new materials and different objects.
- Have the children write their name on their new bridges to save for the next day.
- Move around the room asking some of the open-ended questions in the Questions section below.
- Continue the bridge building investigation for as many days as the children are engaged in it. Try adding more materials like clothespins to hold the craft sticks together.
Questions:
- Why did the bridge fall?
- What can you do to make your bridge stronger?
- What do you think will happen if you...?
- How can you find out?
- Why do you think that?
- What else could you try?
Tips For Success:
- Have enthusiasm for the investigation. If you are excited, they are excited. Make it a challenge that is fun.
- Have a variety of light weight objects available for testing the bridges so they have some success on day 1.
- Store the bridges with names on them in a large tub or by group or table.
- Leave the testing areas with the support structures set up for the week or the days you will be doing the investigation to save on set up time every day.
Extension Ideas:
- Encourage the children to test their bridges by using blocks to create a gap or have the bridge go from one table or shelf to another.
- Encourage the children to build bridges in the block area and with LEGOs.